

Pretty, right?
I’m kind of obsessed with the new barnwood desks that I constructed for us last weekend out of very old wood from Minnesota. And I did it all without any woodworking. I don’t own any power tools (or even a manual) so these were made from planks of wood, as we bought them.
I don’t profess to know exactly what I’m doing, but I did a ton of research and am really happy with how our desks have turned out.
It all started with this ad on craigslist that I noticed WAY back in early May.
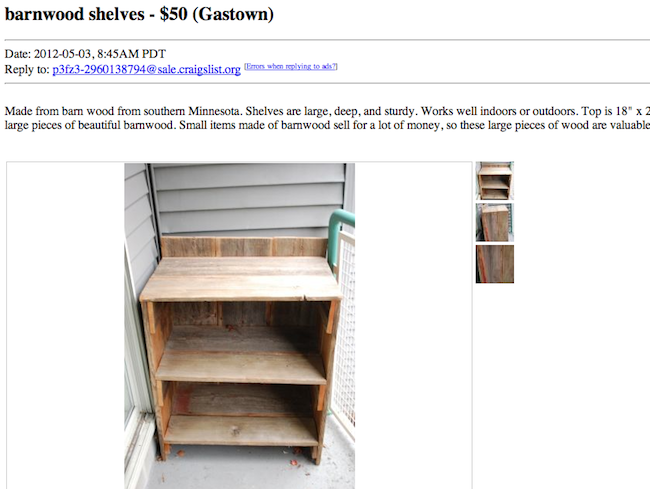
Yup, this pretty little barnwood shelf being offered for $50. I immediately emailed the seller (Hi Jenny!) and offered $40, because I knew my project was going to take a lot of work. And as you all know, we’re on a budget!
Jenny loved her shelves and said that since I had a neat plan for them and they were going to a good home, she cold give them to me for $40. Woohoo! I also bought a super cute barnwood folding wooden chair from her for $10.
Since we were driving our friends little car, the hubs and I actually had to deconstruct the shelves before taking them home. You should have seen us on the street in Gastown, hammering apart our wood. We were a spectacle, to say the least.
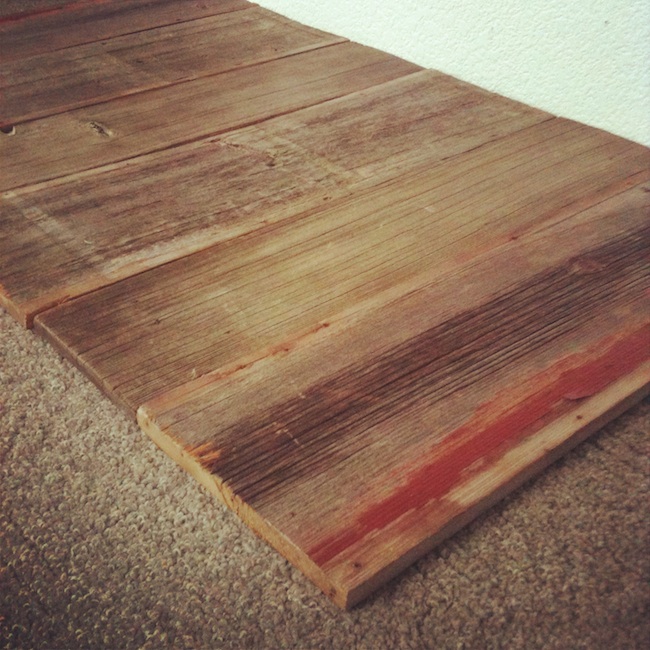
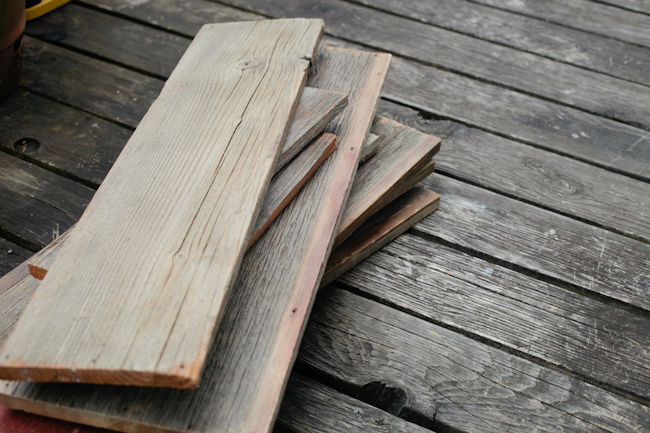
With the move and the furnishing and the travels and all the things that were going on, the desk project sort of fell to the bottom of the pile until early June when I laid out all the pieces of wood and designed two desktops. Lucky for me, the desks wouldn’t require woodworking.
This image is from my instagram feed… on June 6th.
I knew what I wanted the tops to look like. But I wasn’t sure about the legs. That is until I saw this guy.

And I learned about Ikea’s Vika Moliden nickel plated underframes, and my heart skipped a beat. So on a trip to Ikea in early July, I bought them.
But I STILL wasn’t ready to build the desks.
Why?
Because I didn’t know how to finish them.
Lots of sites on the internet (including this one) told me Howard’s Feed & Wax was our best bet… but we don’t have a ton of suppliers in Canada so I just sort of let it slide. And slide. And slide. Until last week when my teensy tiny little desk was driving me crazy and I decided I couldn’t take it anymore. It was time to figure out what to do.
In terms of finish, I knew I didn’t want anything that would cause us to lose the beautiful patina of the boards. I also didn’t think I wanted shiny. But I needed something that would be a little hard, because these are our work surfaces, and sometimes we rest our arms on them for 16 hours a day. (Unfortunately). So I was torn. Do we poly? Do we varnish? Do we wax? Do we oil?
So I spent hours in woodworking forums, and like a very bad blogger I forget where I learned that wax is softer than oil is softer than poly is softer than varnish. And oil gets harder depending on the type. And the number of coats. A little bit of further research answered my pressing question: if we oil the wood and it ultimately isn’t hard enough for our wrists, can we poly over it? The answer from the internet = yes. So that made my decision easy: tung oil it was. (I don’t remember why I chose Tung Oil, it was the same forum that made me choose that, but I just remember going into the hardware store knowing Tung Oil it was). So, with that, I was ready to start constructing.
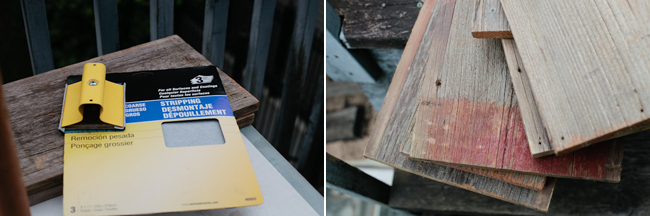
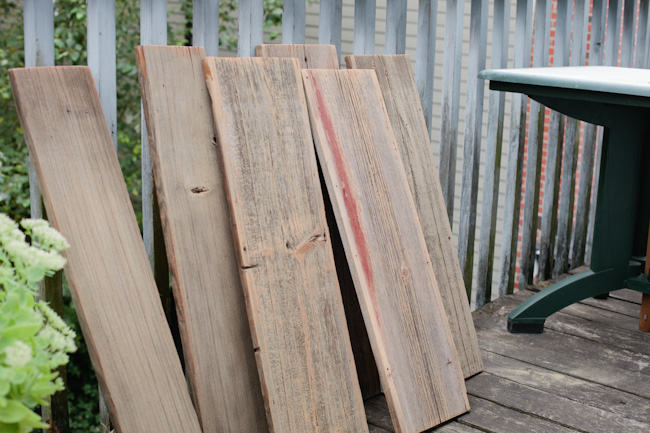
The whole project took me from 8am (to pick up 1x4s, wood glue, Tung Oil, and lint-free cloths) to 7pm last Sunday. And started with taking my wood outside to sand.
I used 60 grit sand paper and a hand sander. (Also, a ton of elbow grease). It was totally worthwhile. I was able to soften the wood up dramatically, make a rounded corner (for our wrists), and not worry about over sanding (as I would have with an orbital sander).
Looking good right?
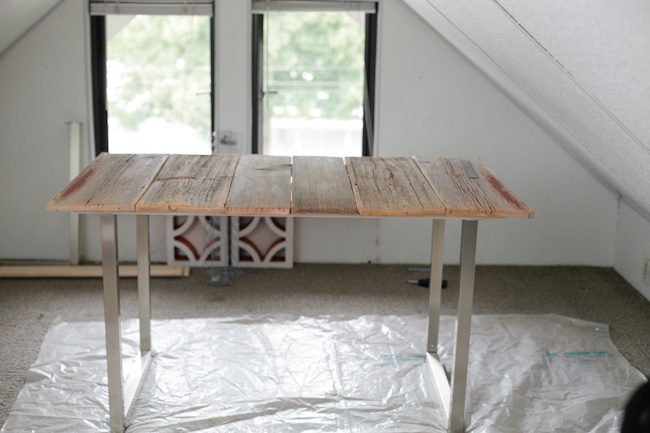
The next step was laying out the boards in the desk configurations.
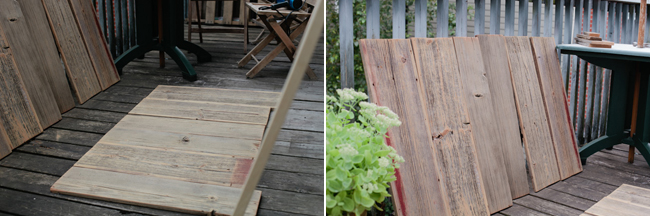
You’ll notice the two end pieces stick out in one of the desks. That’s because we don’t have a saw. And It’s a great place to hide cords. To get rid of all the dust from the sanding I first used my blowdryer. But then I realized there was still a ton of dust hiding in the crevices so I vacuumed it. Then I washed it and let it dry while I got to building the bases for my desks!
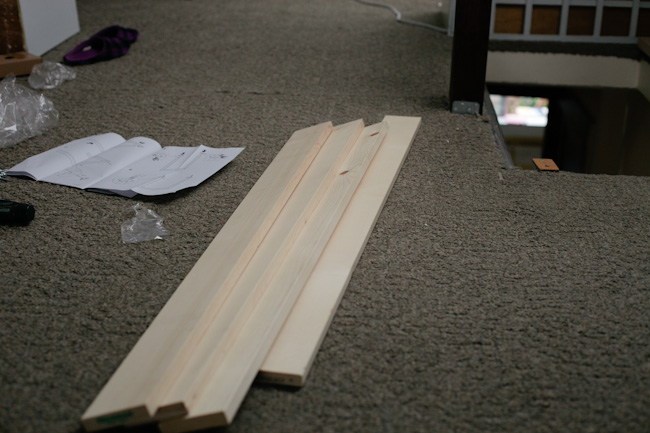
Which required some 1x4s. And the building of four under frames (love Ikea). Which, in turn, created lots of garbage …
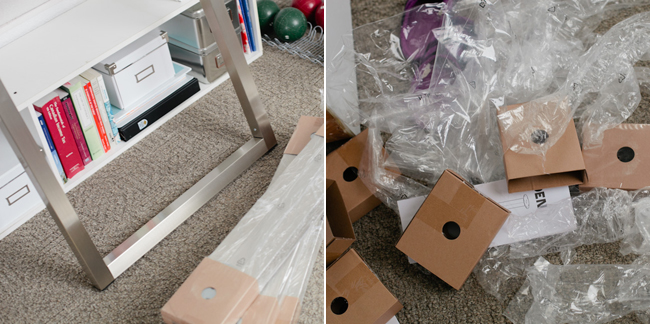
The bases for the desks are made out of two 1x4s and two under frames.
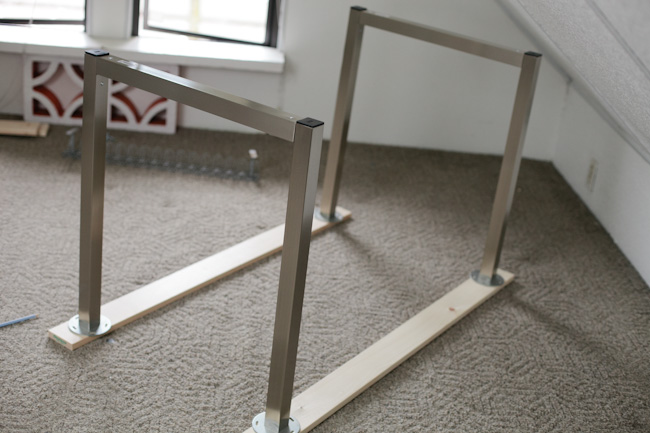
Since I don’t own any of those sawhorse things, I decided to build the bases first, then just construct my desktops on them directly.
I know enough about woodworking to know that I needed wood glue at this point. So, I followed the directions on the Gorilla Wood Glue package. But, since I don’t own clamps, and wasn’t in the mood to spend any more money (and also because I don’t see any woodworking in the near future), I used heavy electronic equipment in place of clamps. It seemed to work well enough!

After the glue had set, next was nails. I didn’t want any shiny modern nails in these desks, so I salvaged the nails that had been used to construct the original shelving unit… way back at the top of this post.
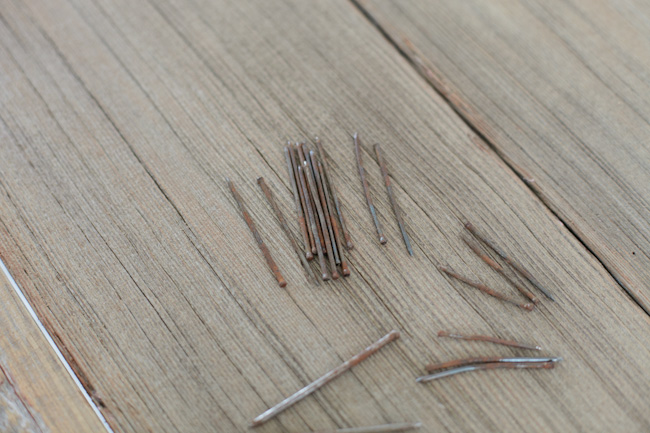
I nailed 1-2 nails in on each board to secure the boards to the 1x4s. And then I was ready for the finishing step. Step Tung Oil.
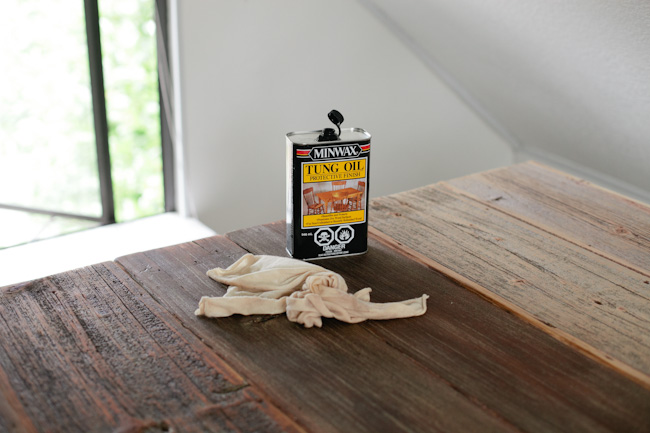
When the oil is still wet it is much, much darker than when it dries, but you can see the dramatic difference in colour of the wood but not in loss of patina.
And just in case you think I’m a super neat project doer because of these beautiful clean images to date… here you can see what our attic really looked like as the project was in process.
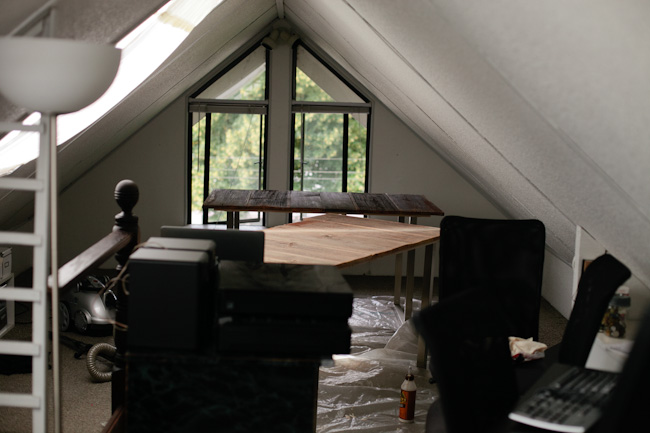
Once they were dry enough I got rid of the drop cloth and moved them to their final homes.
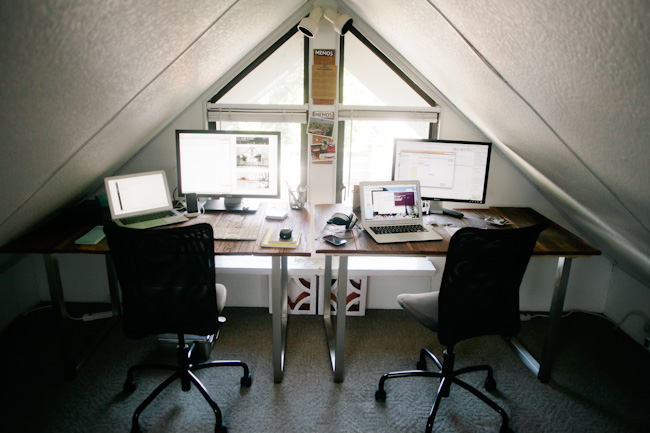
Pretty, right?
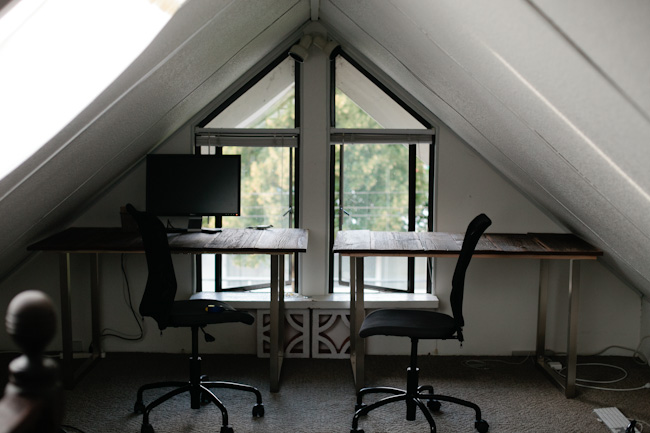
I then set up on the less good desk (the one on the right) and worked there for a couple of days while the hubs was in Ontario.
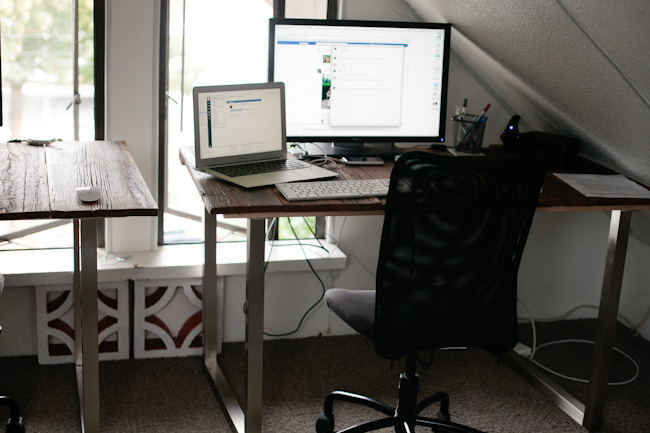
And here is how our workspace is looking today. When he got back, he decided he liked the desk on the right (the less good desk) better. Which is sweet for me. Because the desk on the left is a bit wider, so I get to sit further back from my big monitor.
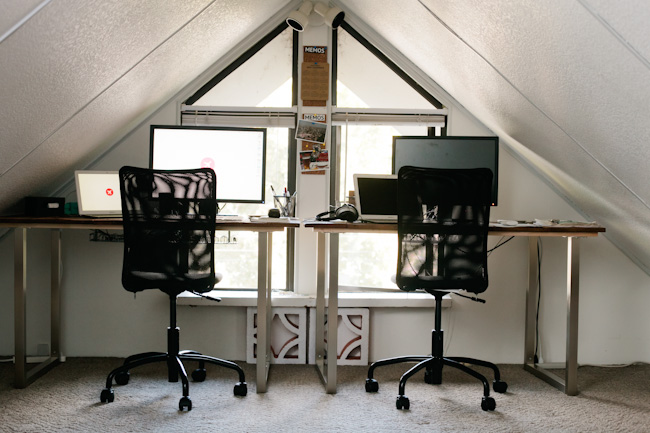
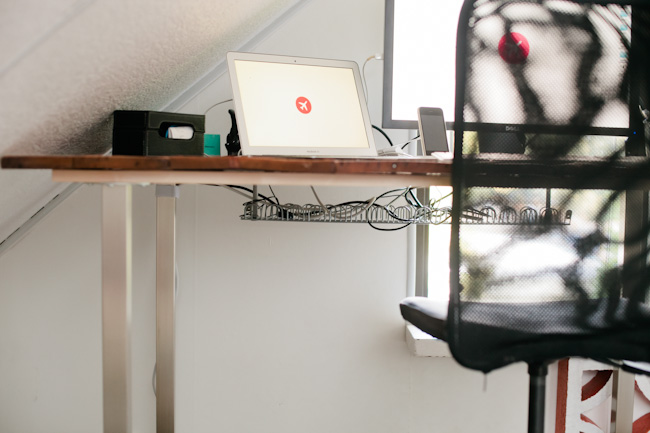
You’ll notice our sweet cord management. (All our electronics are plugged in in this picture.)
My cords are managed by a $20 ikea cord manager.
The hubs’ by a concoction I developed out of a $1 bin at the dollar store and particle board that we found in the storage room.
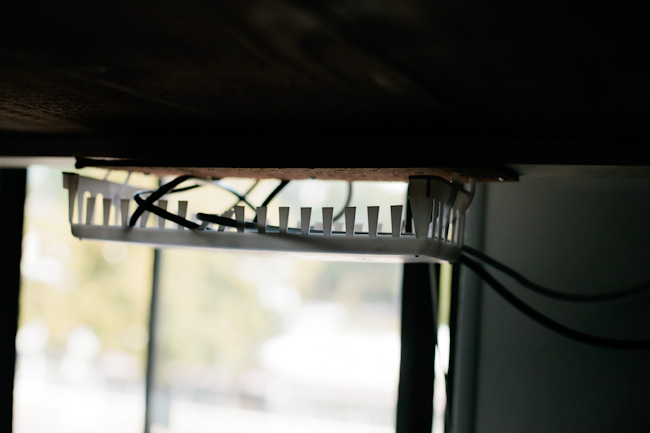
Both work equally well and are awesome.
And here’s one more view of the pretty desks.
Yippee! Happy Friday everyone!